Logical Volume Management (LVM) Setup
Provision a new logical volume from an additional disk (vdb) and mount it to /mnt/data:
1. Identify Additional Disk
Verify the presence of the additional 20GB block device:
check block devices:
lsblk
output:
vda     252:0    0   50G  0 disk
├─vda1  252:1    0 49.9G  0 part /
├─vda14 252:14   0    4M  0 part
└─vda15 252:15   0  106M  0 part /boot/efi
vdb     252:16   0   20G  0 disk
2. Initialize Physical & Volume Group
Prepare the raw device for LVM:
initialize physical volume:
sudo pvcreate /dev/vdb
create volume group:
sudo vgcreate vg_data /dev/vdb
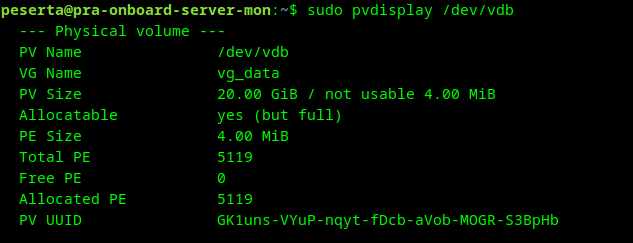
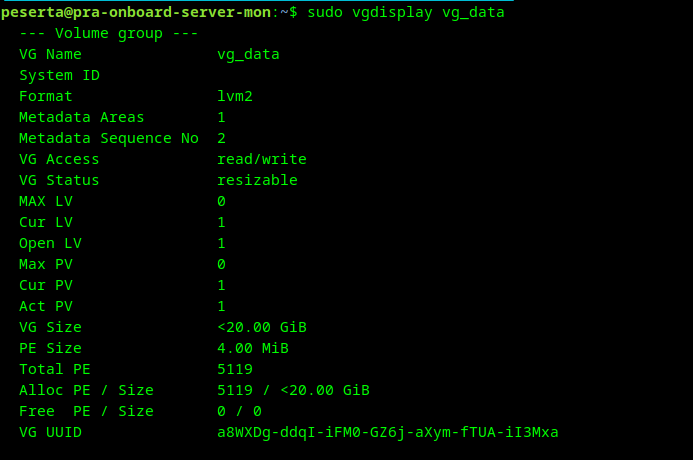
Verification (PV & VG)
Verify that the Physical Volume and Volume Group were created correctly:
check physical volume:
sudo pvdisplay /dev/vdb
check volume group:
sudo vgdisplay vg_data
3. Provision Logical Volume
Create and format the logical volume to utilize the full available capacity:
create logical volume:
sudo lvcreate -l 100%FREE -n lv_data vg_data
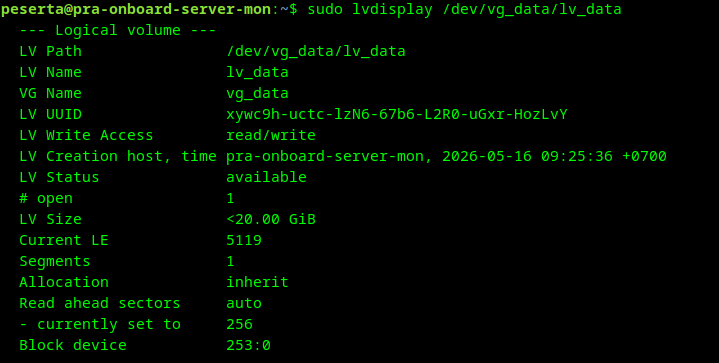
Verification (LV)
Verify the Logical Volume properties:
check logical volume:
sudo lvdisplay /dev/vg_data/lv_data
format partition (ext4):
sudo mkfs.ext4 /dev/vg_data/lv_data
4. Mounting & Persistence
To use the new volume and ensure it remains available after a system reboot, you must mount it and register it in the filesystem table (/etc/fstab).
A. Manual Mount
Create the mount point and perform the initial attachment:
create mount point & mount:
sudo mkdir -p /mnt/data
sudo mount /dev/vg_data/lv_data /mnt/data
B. Configure Persistence (fstab)
Retrieve the Unique Identifier (UUID) and add it to the system configuration:
get block device id:
sudo blkid /dev/vg_data/lv_data
output:
/dev/vg_data/lv_data: UUID="a0649047-33ad-40aa-8e2a-dd0f6cea2358" BLOCK_SIZE="4096" TYPE="ext4"
append to fstab (use your actual UUID):
echo 'UUID="a0649047-33ad-40aa-8e2a-dd0f6cea2358" /mnt/data ext4 defaults 0 2' | sudo tee -a /etc/fstab
verify fstab entry:
sudo cat /etc/fstab

verify fstab validity:
sudo mount -a
